Cuban Roast Chicken + Crack Sauce

24 03 2010

And now, back to the bird. Every so often I get a serious craving for this chicken… The thing I miss the most about lunch in New York is Sophie’s. If you live there and you haven’t been, do yourself a favor and go for lunch sometime. If you work anywhere near the financial district and you haven’t been… shame on you.

The chicken part of this dish is, in the end, just a supporting role. The sauce is the real star, the reason you eat at Sophie’s at all (other than the roast pork, of course). The meat is great, but don’t kid yourself – the reason you’re eating it is just to get the green sauce into your mouth. We called it the crack sauce. I’ve googled and searched and can’t find a solid explanation anywhere of what it is. I decided to take a shot and see if I could make it happen. It’s been a while so it wasn’t so fresh in my memory but the taste of that sauce is pretty tough to forget.

The dish is simple and you don’t have to do much but the important part is that all of these simple bits have some flavor. Chicken, rice, beans, plantains, carrots and sauce. That’s it. Nothing complex and definitely not rocket science. Don’t mess with chicken breast though – go for the legs/thighs and be happy that you’re eating chicken with some flavor. “Wa wa dark meat is fatty bla bla bla” – you’re eating chicken! It’s not like it’s beef. Shut up and eat the good stuff and leave those dry flavorless breasts for the people who don’t know any better. If you have a problem eating dark meat, you should probably be eating tofu anyway…

 
Cuban Roast Chicken with the Crack Sauce

Chicken
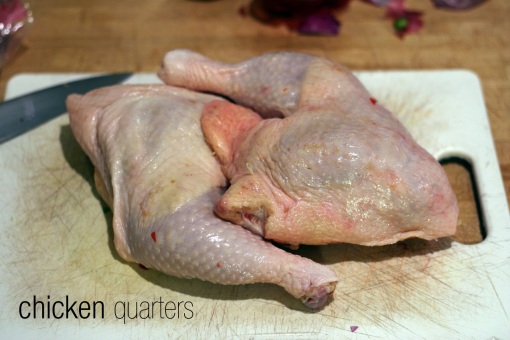
Skin-on chicken leg & thigh pieces
Garlic
Oregano
Cumin
Salt
A little lemon juice

Sauce
3-4 cloves garlic, smashed
2 jalapenos (I used canned but fresh would be even better as long as they’re hot)
Cilantro – a little or a lot, however you like it
Lime juice from half a lime
2-4 tablespoons plain yogurt (I used Trader Joe’s European Style)
Salt – a pinch

Beans
1 large can black beans (or cook some dry beans – obviously better but canned are fine too)
1/2 a medium onion (I use yellow ones)
2-4 cloves garlic
1 jalapeno (again, I used canned but fresh is good too)

Plantains
Ripe plantains
Oil
Salt

Rice
1/2 brown, 1/2 white, cooked with a couple cloves of garlic and some salt

And you can toss a couple of carrots in the roasting pan too if you like carrots – they go well and they’re good for your eyes, right?

————

First things first – get the rice steaming. If you don’t have a rice cooker and you make rice more than once a month – buy one. It’s an amazingly worthwhile investment and you’ll probably eat more rice because you have it.

 
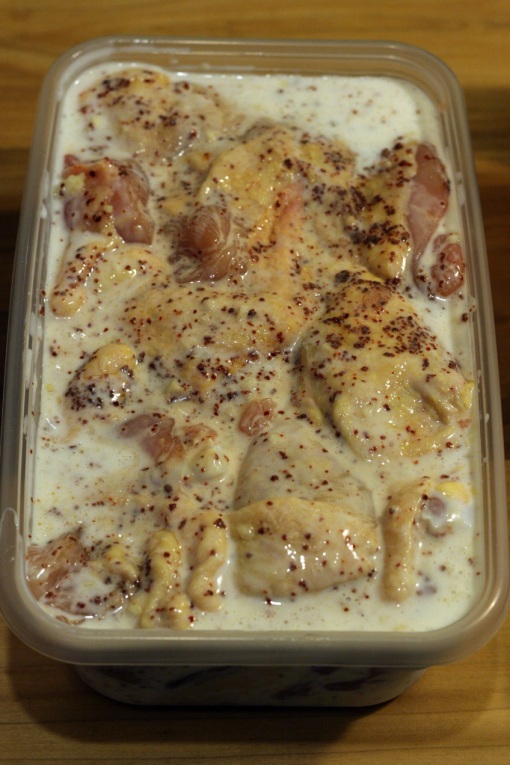
Grind up the dry chicken seasoning (or mix if you’re just using ground spices), mix in a little lemon juice (it should still be fairly pasty) and rub it around under the chicken skin. Toss the bird in the oven at 350 for about 40 minutes. At that point crank it to 450 for another 5 or so minutes until the skin is brown and crispy.


While that’s working, you have plenty of time to fix up the rest.

The sauce was an experiment but it turned out great. It’s a creamy, green, garlicky, tangy, spicy *hot mess*. The sauce is creamy but I was at a loss as to what to use to get that consistency… Maybe it’s the Armenian in me… or no wait, there’s no Armenian in me… either way, yogurt was the first thing that came to mind. I’m not sure that it’s what they’d use in Cuba or at Sophie’s, but it got the job done… and got it done well. Add the yogurt a tablespoon or so at a time until you get a good consistency.

The Crack.

 
The beans get flavored with something like a sofrito, I guess. Just simmer the garlic, onion and pepper in some oil for about 10 minutes or so until it’s softened up and then toss in the beans and simmer until they’re nice and hot. Season with some salt.

 
At this point your chicken is probably halfway done or so. Take a minute to slice up those carrots however you want (I like to do big sticks where I basically just quarter them lengthwise) and then toss them in the roasting pan with the chicken. At this point you should have some fatty juices collecting in the bottom of the pan so you can try to slide them under the bird, maybe even lift the chicken pieces to get the carrots down in that juice.

 
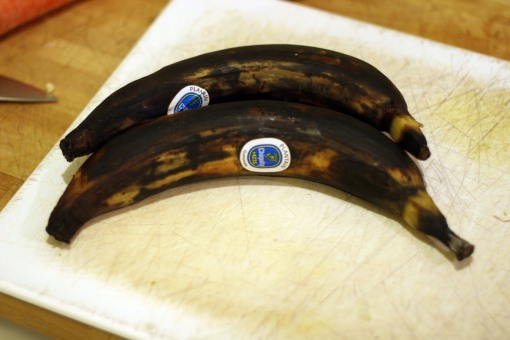
The most crucial move when making plantains is choosing the right ones. You’ll be tempted to pick ones that are yellow, maybe even yellow with some dark spots – that’s because you’re used to choosing bananas. Put those ones back and grab a couple that look like they were forgotten at the bottom of the fruit bowl for a couple weeks. We’re talking black here. Soft, black and sweet – riiiipe. You see?

Slice em “on the bias” so you get some nice surface exposure to caramelize.

Sautee them in some vegetable oil (or butter if you’re feeling fatty… nothing wrong with a little butter). Sautee them in low to medium heat until they are nice and brown on each side. There’s no rule about flipping here, just get em brown.

They should look something like the shot below. The darker ones on top were actually better – a little bit crispy, good and caramelized, and still soft inside.

 
Toss those carrots around a little more and crank that oven heat for the last few minutes.

 
And then, you eat. And make sure you make enough to have some leftovers – you’ll want more tomorrow.


Pho Sho

15 03 2010

As a cold wages war on my body I’m in need of some serious sick food. Chicken noodle soup was the obvious answer. One of my favorite noodle soups, chicken or not, is pho. Pho is the perfect example of Vietnamese food combining some of the best flavors – salty, umami, sour, spicy, sweet… and so many more. Pho traditionally contains rice noodles but I didn’t have any around. I did, however, have soba – Japanese buckwheat noodles – which are a little more healthy anyway so I decided to give em a shot. Good move.

I made fried chicken this weekend and decided to de-bone all the chicken before frying so I had a nice sack of bones in the freezer ready to boil for my soup broth. Ideally you’d simmer it for a lot longer but I’m feeling sick and was hungry so I only simmered it for about an hour. In my opinion, the thing that really makes pho broth distinct is star anise. This stuff is intensely licorice-y and you don’t need much of it. It works amazingly well in this broth. Coriander is also great in chicken pho broth but I didn’t use any this time.

Pho:

Hot broth
Meat (or not)
Noodles
Super thin sliced onion

Basil
Cilantro
Lime (or lemon if you have to but it’s really not the same)
Fish sauce
Hot sauce

That’s all you really need… the thing though, that makes it great and special, is the broth. I’m too tired to go into it but there are any number of versions… different broth for beef, different one for chicken, etc… this is a simple version that’s easy to throw together any night of the week. My Vietnamese friends will probably not approve…

If you want to make a vegetarian version you can but it really won’t have the depth of a meat broth. If you want to read about why broth made from bones is good, click here.

Bones – you can roast them first if you want a deeper broth, but it’s fine to just toss em straight in the stock pot and get right to it. Like I said, this is a quick version, so just toss em in the pot.

Water – cover the bones. I used about 2 quarts but what’s important isn’t a certain measure of water or bones, but the ratio between the two. Not enough bones and your broth will be weak.

Onion – this broth also depends on some serious onion presence. I peel and quarter an onion and toss the whole thing in. If you have time to spare, char the onion’s skin first over your stove’s flame.

Spices:
1 whole star anise
1/2 stick cinnamon
1 bay leaf

You can also add ginger, rock sugar (or regular), cloves, cardamom, fish sauce, salt… experiment. I just use what I have around rather than worrying about making sure it’s exactly like it’s supposed to be the way someone else made it.

Boil it for the first few minutes and skim off all the skum that bubbles to the top. Simmer for about an hour, skimming more as necessary. Boil it longer if you have the time, but at very least an hour. I also simmered the chicken meat with the broth to cook it at the same time and flavor the broth even more. You can roast it separately or simmer it in the broth – either is fine.

To eat – load your bowl full of noodles, slice the meat, slice an onion super thin and toss both in with the noodles. Ladle on the hot broth and then top it off with some basil and cilantro. Squeeze in the lime, spice it up with chili sauce and season it with fish sauce.

Now, this is where you have to trust me, if you’ve never had fish sauce… trust me trust me trust me. You’re going to say “well that sounds gross but since I respect your opinion so much I’ll give it a shot.” Then you’ll get home and open that bottle of fish sauce and wonder why you ever listened to me when you smell it. And again you’re going to want to leave it out. But trust me, ignore what you smell and shake it in. You will not regret. For as bad as it smells, it tastes twice as good.

And enjoy.

 
With my leftovers I chopped everything up and made chicken salad to toss on a baguette for lunch tomorrow. Chopped chicken, lime juice, cilantro, basil, fish sauce, a tiny bit of sriracha… and I’m gonna tie it all up with some mayo.
*Update – the sandwich with the leftovers was almost better than the soup itself! I will definitely be making that again. I tossed what you see in the picture with some mayo, spread it on a split open soft french roll, and toasted it until it was all nice and hot and crusty. Topped it off with some sliced avocado and wow… mmm mmmmmmm.


KFC

31 01 2010

Korean Fried Chicken. Well, more like Southern style fried chicken with a Korean kick. The Colonel ain’t got shit on me. King Kong either, for that matter. Fried chicken is hands down one of my favorite foods ever. EVER. It’s probably my “if you were stuck on an island and could only eat one thing for the rest of your life…” – yes, I’d eat it forever.

This can easily work as just a simple fried chicken and it would be bad ass just as it is, but seeing as how I’m equipped with what seems like an unending supply of Korean chili flakes and sesame seeds, I figured I’d put em to good use. This would definitely be better if the bird could sit in the marinade overnight, but the couple of hours I had it in there turned out to be plenty to give it some good flavor.

First step, was to break down the birds. I started with two whole chickens that I broke down and saved the rib cages for stock I made the next day. Recipe for that to follow. I broke them down into ten pieces: two wings, two thighs, two drums, and two breasts that each got split in half. So from two chickens that cost anywhere from $5 to $10 each, you can get 20 pieces of chicken. Basically a buck a piece (at most) for some damn good chicken. I think that’s even cheaper than Popeyes…

Second move is to season the chicken and soak it in the buttermilk. This is basically combining two techniques of either brining chicken in a seasoned bath, or soaking it in buttermilk. The buttermilk helps to tenderize the chicken but if you’re only soaking it for a couple of hours it’s not going to get to do much of that work. If you soak it overnight you’ll see some results. Either way you get great flavor from the buttermilk so why not bring it along for the ride.

I seasoned the chicken pretty liberally with salt, Korean red chili flakes and a bunch of chopped garlic.

The idea was that since the marinade was only gonna to hit the chicken for a short period, I bumped up how much salt I seasoned it with to make sure it was salty enough. If I were going to let it soak overnight I would definitely have pulled back on how much salt was in there to compensate for the extra soaking time. I also imagine it would get a hellofa lot spicier overnight with the chili flakes in the marinade.

I sealed that up and let it hang out in the fridge for a couple of hours.

I headed over to my buddy Kurt’s house where we were having dinner. He made an amazing mac and cheese to go with the chicken… I’m planning to get the recipe and recreate it. It was insane. When it was time to fry I filled up a deep, heavy stock pot with oil and brought it up to about 350F. You want the oil right around 325F for frying but if you start out a little higher, the first couple pieces of cool chicken in the oil will bring the temp back down. You should keep good watch on the temperature until you get a feel for how hot it is by how quick the chicken’s cooking. It shouldn’t ever drop below 325F.

While the oil was heating up I got my chicken all ready for the ball. Obviously I couldn’t just dredge this chicken in flour and call it a day. If you’re frying chicken (or anything really that you want breaded) generally you’ll dredge it in flour to dry it off, then dip it in an egg wash of some sort (or buttermilk), and then dredge it back in either flour or breadcrumbs. You’re kindof just making a batter on the surface that will actually stick, since if you tried to dunk it in batter it would just slide right off. Don’t ask me why, just trust.

Since this stuff was already soaking in seasoned buttermilk – we passed up the massage and the pool and went straight for the flour treatment. I mixed in with my flour some garlic salt and a whole load of sesame seeds. I went with mostly black ones to give it the cool speckled look and added some light brown toasted ones too for the flavor. Now the holy trinity of Korean flavor was complete – garlic, chili and sesame – through the marinade and the breading. It’s really an unbeatable flavor combination… I’d put it up against just about anything.

When the oil was hot I went to town and started bathing those beauties in the tub. You just fry em a couple pieces at a time for about 10 minutes if they’re totally submerged or about 8-10 minutes on each side if you’re doing it in a shallower pan and can’t completely cover them. The oil should be around 325F – no lower – while they’re frying.

You don’t want to rush them or they’ll be undercooked inside and you really don’t want to crowd them in the pot or the oil will get too cool and they’ll just soak it all up

They should come out looking like this and tasting even better…

 
What you need
Chicken
Buttermilk – to soak
Salt – to season
Flour – to dredge
Hot oil – to fry
A lotta soul – to love it

**Added Bonus**
Chili flakes
Garlic
Sesame seeds

The point really though is that you can flavor it however you want… experiment with the coating. Get crazy. Next time I’m gonna pulverize those sesame seeds in my food processor and see if I can get a really dark coating on it. Maybe chop up some fresh herbs into the flour mixture? Or just keep it simple and old school – buttermilk, chicken and flour. Can’t go wrong there…


Chicken Enchiladas

10 12 2009

I realize that there is a theme developing here… lots of bird-related meals. I don’t know how that happened because honestly until the last few weeks I hadn’t cooked chicken in a long time. On the average I don’t eat nearly as much of it as I do pork… but somehow, here it is again. I made enchiladas last night and they turned out pretty damn good. These are their stories

They can be as simple or involved as you want… they’re good, cheap and easy to make. I’ve had a lot of enchiladas in my life, but until the last year or so I had never actually made them. Turns out they’re super easy to prepare and actually a really economical meal. I used cheap chicken for these but I’d recommend getting a decent bird… I used to claim that I couldn’t tell the difference with organic, free-range meat… but I can definitely tell. It looks different, tastes different, smells different. It tastes cleaner – probably because it is cleaner.


I used leg/thigh quarters because I prefer dark meat, generally… I used the whole quarters because I get extra flavor from the bones and all the other goodies and I get some more skin to play with. First step again – skin off, skin in oven. More chicken chips.


After that I saute the vegetables, toss in the chicken (which I broke down a little bit to fit in the pan better), season the whole lot and crank up the heat a bit. I toss in enough chicken stock to almost cover it and once it’s simmering, cover it and forget about it for a while.


After about 30 to 45 minutes of simmering, the chicken is ready to pull apart. I separate the juice from the filling and set the chicken aside. Now time to make the sauce. I use a little tequila to pull up some of the good stuff that collected on the bottom of the pan, burn off the alcohol, toss the stewing liquid back in the pan and start reducing. I also added a little tomato paste to give it some extra body.


While the sauce is reducing, time to shred the chicken and mix the filling. I added a little bit of the reducing sauce to moisten the filling. I had a big block of mild feta hanging around so I tossed some of that in for flavor.


I spread a handful of the mix on each tortilla, roll them up and pack em in a baking pan. When the sauce is reduced and starting to thicken, I add a little bit of canned Mexican tomato sauce. Now, time to top them.


After the sauce is on, I scatter a little more feta on top and toss the pan in the oven for about 15 minutes to warm them through.


Back up to the top for the final plate. I topped the enchilada with a little more of the tomato sauce and some crispy chicken skin.

Ingredients:

Essential:

– 2 chicken leg/thigh quarters, but could be any cut
– 1-2 cups of stock, broth, water, beer… whatever you have around
– corn tortillas

What makes it better:
oregano
garlic salt
celery seed
mustard seed
– Some paprika would have been good too, although I didn’t use any

– 1-2oz tequila (a healthy shot)
– 1 small can of “Salsa de Chile Fresco” or any similar tomato sauce

cheese – I prefer cotija, feta, etc. but mozzarella is good too

This made about 8-10 good size enchiladas.


Roast Chicken

1 12 2009

I’ve been somewhat obsessed with roast chicken ever since the first time back in high school when I had dinner at my friend Neil’s house and his mom made it for dinner. For whatever reason, maybe because of my absolute awe at this amazing feat on any normal day of the week, it became tradition for his mom to pop a fowl in the oven any time she heard I was coming over for dinner.

So a few weeks ago I came back again to what is probably my favorite roast chicken recipe. If you’re into food and you’ve eaten in San Francisco chances are you’ve eaten at Zuni Cafe. If you’ve eaten at Zuni Cafe aaand you aren’t an idiot… chances are you’ve had the roast chicken. It’s one of those things that doesn’t sound like it could be that good… but really is. It takes an hour but the ambiance in Zuni is so great that the hour feels like 15 minutes and you end up wishing it was longer.

At home, this roast chicken takes a little more advanced preparation, but not really much more than an hour total time involved from hands on chicken to chicken in mouth. They serve it with “bread salad” at the restaurant but you can eat it with whatever sides or salad you want – truth is, all you need is a good beer or a glass of wine and you can eat this bird all by itself.

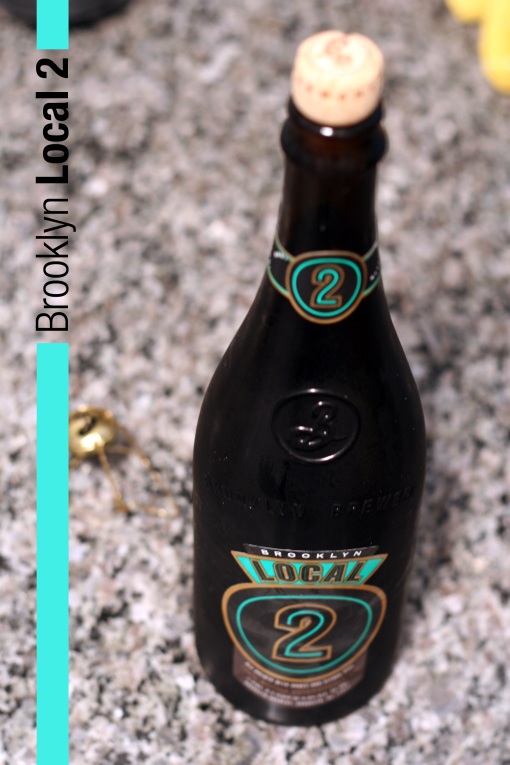
We had it with a pretty cool new(?) brew from Brooklyn Brewery called Local 2. There’s a Local 1 as well, but we opted for the 2. Dark but dry, sweet, slightly fruity but also a little bit chocolatey… good stuff.


Back to the bird. Don’t get me wrong, I’m all about brining. But this salting is just too easy and too good. It’s so simple – the only thing you have to do to make sure it works out is get a small chicken. Otherwise, it’s foolproof.

*It takes at least one day of letting the bird soak up the salt before you can cook.

The secrets are salting ahead of time, and really high heat but shorter cooking time than you would usually use because of the small size of the chicken.

 
Steps:

– get a small bird: 2.5-3.5 pounds
– dry it off really well with a paper towel, your shirt, handkerchief… whatever you have
– salt it with 1 teaspoon of kosher salt per pound of bird
– refrigerate the bird for at least a day, up to 3

– when you’re ready to cook, crank the oven somewhere in the neighborhood of 475f
– pop the bird in and roast breast side up for about 30 minutes until it’s nice and brown and sizzling like hell (you may have to cut the heat down a little bit if it’s getting too crazy in there and starting to smoke or burn)
– flip and roast for another 10 or so minutes
– flip again and roast for a final 5-10 minutes – in total about 45 minutes or so

*tuck the wings behind the body and you won’t need to worry about tying or trussing or any of that
**you can also shove a little bit of thyme under the skin of the bird if you’re into that sort of thing… it’s good.